Most HomeLink programming guides show one step: hold the original remote near the button, press together until the light changes. For fixed-code gate openers — the kind with DIP switches inside the remote — that’s enough.
For rolling-code systems, it isn’t. LiftMaster Security+ 2.0, Chamberlain Security+, and Genie Intellicode all require a second step at the opener’s control board. Skip it, and HomeLink learns the transmission frequency but the gate receiver never authorizes it. The gate ignores every press.
This guide covers how to identify whether your opener uses rolling code, the complete two-step pairing process, and the failure modes that catch most people.
Is your opener rolling code?
Most residential gate operators installed after 2005 use rolling code. Check these two things before starting.
The learn button color (LiftMaster and Chamberlain gate operators):
- Yellow button: Security+ 2.0, 310/315/390 MHz tri-band rolling code (2011 and newer)
- Purple button: Security+, 315 MHz rolling code (roughly 2005–2011)
- Red or orange button: Security+, 390 MHz rolling code (roughly 1997–2005)
- Green button: Billion Code, 390 MHz (roughly 1993–1997)
The remote label. Security+ 2.0 remotes say so on the face or near the battery compartment.
Fixed-code remotes are easy to spot: they have a row of 8–12 small rocker switches inside the battery compartment, each representing one bit of the access code. These are uncommon in gate installs after 2010, but some older Mighty Mule and TOPENS units still ship with them. Fixed-code openers only need Step 1 below.
If your gate uses a DoorKing or FAAC unit with its proprietary protocol, HomeLink pairing may not be supported at all. Verify in the opener’s documentation before starting.
Step 1 — Train HomeLink to the remote
- Park the car close to the gate. Within 10 feet if the driveway allows.
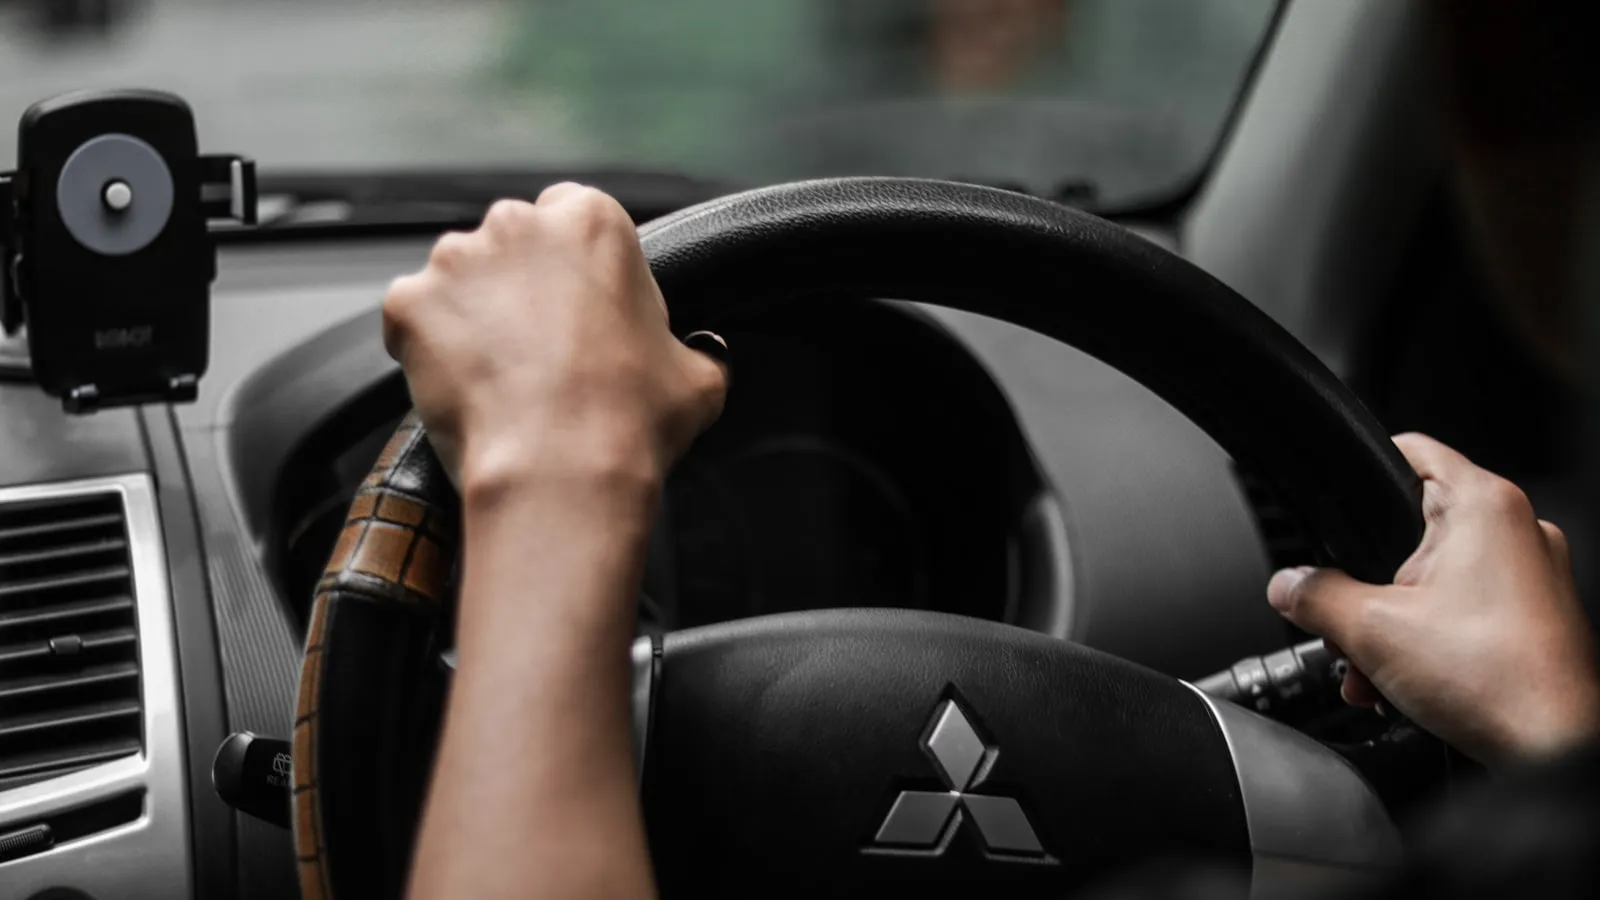
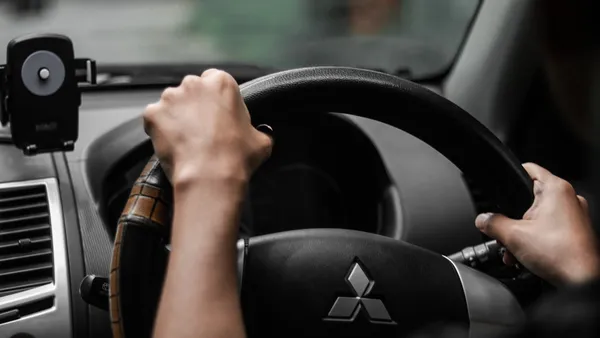
- Hold the original gate remote 1–3 inches from the HomeLink button. On most vehicles, HomeLink is on the overhead console or the driver-side visor.
- Press and hold both the HomeLink button and the remote’s button at the same time.
- Hold until the HomeLink indicator changes — typically from a slow blink to a rapid flash. This takes 20–30 seconds on most vehicles.
- Release both buttons.
At this point, HomeLink has captured the frequency and transmission pattern. For fixed-code openers, pressing the HomeLink button will now open the gate. For rolling-code openers, the receiver will likely not respond — the second step is still needed.
Step 2 — Authorize the rolling-code receiver
This step happens at the gate opener’s control board, not from the car.
- Open the cover on your gate operator’s motor housing to access the control board.
- Press and release the learn button once. The learn LED (same color as the button on LiftMaster units) will illuminate. You have roughly 30 seconds.
- Walk back to the car and press the trained HomeLink button. On Security+ 2.0 (yellow-button) operators, a single press often isn’t enough — press it up to three times in succession. This press-three-times finale is the step most guides skip, and it’s the single most common reason a pairing that “looked done” never works. The first press or two get consumed by the rolling-code handshake before the receiver has fully accepted the new transmitter.
- The gate should move. If it does, the pairing is complete — the control board’s learn LED will go off.
If the gate doesn’t respond in time, return to the control board and repeat from Step 2. You do not need to redo Step 1.
For gate operators with the control board mounted at the post rather than on the motor housing, this process benefits from two people: one at the car, one at the control board, coordinating by phone.
The failure modes that catch most people
The 30-second window closed. The most common cause of Step 2 failure. Press the learn button, then move immediately to the car. If you’re timing it alone and the driveway is long, do a dry run first to gauge the distance.
HomeLink flashes rapidly after Step 1, but the gate ignores it. The frequency was captured but Step 2 was skipped — or Step 2 was run but the HomeLink button was only pressed once at the end. The receiver was never fully told to accept this HomeLink unit’s rolling-code sequence. Go to the control board, press the learn button, and this time press the HomeLink button up to three times. Owners who document several failed attempts almost always have this exact gap: every other part of the sequence is right, but the press-three-times finale is missing.
You’re pairing with an aftermarket remote and it just won’t take. This is the contradiction that sends people to forums for hours: a no-name or “universal” remote opens the gate perfectly through the learn button, yet HomeLink flatly refuses to learn that same remote in Step 1. A LiftMaster dealer will tell you “universal remotes are junk, all of them.” An owner will tell you “but mine works fine on the door.” Both are right — they’re describing two different jobs. Operating the opener takes one valid code. Cloning into HomeLink takes the precise rolling-code signal HomeLink captures and reproduces, and universal remotes commonly cycle several frequencies (310/315/390 MHz) rather than the single clean one HomeLink locks onto. The remote does enough to run the door, not enough for HomeLink to copy.
The fix owners and LiftMaster techs both land on is to train HomeLink from a genuine single-function manufacturer remote — for yellow-button Security+ 2.0 operators, a 893LM, 890MAX, or 893MAX; for red/orange-button 390 MHz units, a 971LM or 973LM. The plain “universal” remote on the hardware-store shelf will keep opening the gate, but it commonly won’t program HomeLink even when its packaging lists your opener. If Step 1 never reaches the rapid flash with a third-party remote, that’s the cause: train from a genuine remote, or skip the remote and pair straight from the opener’s learn button (Step 2 alone).
The gate opens once, then stops responding. The rolling-code sequence fell out of sync — usually because Step 1 was done with the remote held too far away, capturing a partial or corrupted transmission. Clear the HomeLink channel (most vehicles: hold the first and third HomeLink buttons simultaneously until the indicator flashes rapidly and then fully stops — closer to 30 seconds than 10 on some cars; releasing early leaves the channel half-cleared), then restart from Step 1.
Everything looks right but the handshake never completes — check bulbs and sensors. Two interference sources catch people late. First, LED bulbs in the opener’s light sockets: LiftMaster prints a “no LED bulbs” warning under the socket because the bulb’s electronics throw RF noise across the learn frequency. Swap them for incandescent while programming. Second, on the car side, some vehicles’ parking and lane-assist radar sensors sit close to the mirror and interfere with the transceiver — owners of certain Audi and Hyundai models report that the only way to finish programming was to pull the fuse for the driver-assist sensors, train HomeLink, then restore it. If the sequence is right but the indicator won’t settle, these are the two things left to rule out.
When HomeLink can’t pair at all — the Compatibility Bridge
Sometimes Step 1 never captures a signal no matter which remote you use, and pairing from the learn button never authorizes the car either. When nothing takes, the cause is usually a version mismatch: the HomeLink unit in the car and the opener’s receiver are different generations that can’t complete the handshake directly.
For Security+ 2.0 LiftMaster and Chamberlain operators (2011 and newer), the official fix is the HomeLink Compatibility Bridge — model 855LM, also sold as HOMELINK RPTRMC. It plugs in near the opener and converts the car’s HomeLink signal into one the Security+ 2.0 receiver accepts, and it ships with its own programming remote. One bridge can serve multiple openers and multiple vehicles, so a two-car, two-door household needs only one. Expect roughly $50.
The bridge is specifically a HomeLink-to-Security+ 2.0 translator. It does not help with proprietary non-LiftMaster/Chamberlain systems — a DoorKing or some FAAC units either accept a remote HomeLink can clone or they don’t, and no bridge changes that.
Range reality for driveway gates
Residential driveway gates are commonly 50–300 feet from where a car sits at the street. HomeLink’s effective transmission range against a gate receiver is roughly 50–100 feet under clear-line-of-sight conditions.
If your gate is near the property entrance, HomeLink will work reliably from the street. If it’s set well back — a long driveway where the gate is an eighth of a mile from the street — HomeLink will trigger once you’re already inside the property, not from outside it. This is the same physical constraint as any RF remote: signal fades over distance.
This is also why the original RF clicker sometimes outperforms HomeLink at range: a clicker aimed upward directs its signal, while the HomeLink transceiver in the rearview mirror housing transmits in a fixed forward arc.
For more on the mechanics behind why HomeLink behaves differently on driveway gates than on garage doors, see Why HomeLink Stops Working with Your Driveway Gate. If you’re pairing to a LiftMaster operator specifically, the Tesla HomeLink + LiftMaster pairing guide covers the same two-step process with LiftMaster-specific context.
For homeowners whose gate sits far enough back that RF range is the limiting factor, there is a newer category of gate automation that doesn’t rely on transmission range at all. Proxly operates on vehicle location rather than radio signal — the gate begins moving when the car is 300 feet out, with no button press from any distance.
Frequently asked questions
- No. The rolling-code state lives in the gate receiver and the remote's electronics, not the battery. Replacing the battery in the original remote won't reset the sync. If you replace the remote itself with a new unit, pair the new remote to the opener first, then train HomeLink to the new remote.
- Some Nice/Apollo models accept universal remotes that HomeLink can clone. Others use proprietary rolling code that HomeLink cannot replicate. Check your specific model's remote compatibility list, or contact Nice directly, before attempting to pair.
- Older fixed-code gate operators use DIP-switch remotes rather than rolling code and don't need a learn button. Any remote transmitting the matching frequency and code pattern will work. For these openers, only Step 1 is needed: train HomeLink to the remote signal.
- Both facts are real, and the reason is the difference between operating the opener and being cloned. Running the door only requires sending one valid code. Programming HomeLink requires the remote to send the precise rolling-code signal HomeLink captures and reproduces — and 'universal' remotes often cycle several frequencies (310/315/390 MHz) instead of the single clean one HomeLink locks onto. So the universal remote does enough to open the gate but not enough for HomeLink to clone. Train HomeLink from a genuine single-function manufacturer remote: for yellow-button Security+ 2.0 operators that's a 893LM, 890MAX, or 893MAX; for red/orange-button 390 MHz units, a 971LM or 973LM. Or skip the remote and pair straight from the opener's learn button. The universal remote on the shelf will keep opening the door — it just isn't a reliable source for HomeLink to learn from, even when its packaging lists your opener.
- Only if HomeLink won't pair at all — Step 1 never captures a signal no matter the remote, and pairing from the learn button never authorizes the car. That usually points to a HomeLink-version mismatch between the car and the opener. For Security+ 2.0 LiftMaster and Chamberlain operators (2011 and newer), the official fix is the HomeLink Compatibility Bridge, model 855LM (also sold as HOMELINK RPTRMC). It plugs in near the opener, converts the car's HomeLink signal into one the Security+ 2.0 receiver accepts, and ships with its own programming remote. One bridge can serve multiple openers and multiple vehicles, so a two-car, two-door household needs only one. It does not apply to proprietary non-LiftMaster/Chamberlain systems like DoorKing.
- On Security+ 2.0 (yellow-button) operators, a single press at the end usually isn't enough. After pressing the learn button on the motor, press the HomeLink button up to three times in succession. The first one or two presses get consumed by the rolling-code handshake before the receiver fully accepts the new transmitter. This press-three-times finale is the step most guides omit, and it's the most common gap among owners who report several failed attempts.
- If the indicator keeps flashing slowly and never reaches the rapid flash, HomeLink isn't capturing a stable signal. Owners trace this to a few causes: a weak battery in the remote, the remote held too far from the HomeLink button, a band the car doesn't cover, or — commonly — a third-party remote whose transmission isn't clean enough for HomeLink to learn. Try a fresh battery and hold the remote 1 to 3 inches away; if it's an aftermarket remote, switch to the original or pair from the opener's learn button instead.
Do I need to reprogram HomeLink if I replace the gate remote's battery?
Does HomeLink work with Nice/Apollo gate openers?
What if there's no learn button on my gate opener?
My cheap aftermarket remote pairs to the opener but won't program HomeLink. Why?
Do I need a HomeLink Compatibility Bridge?
I pressed the learn button and the HomeLink button once, and nothing happened. What am I missing?
The HomeLink indicator flashes but never goes solid during Step 1. What's wrong?
Keep reading
Pairing HomeLink to a FAAC Gate Opener
Step-by-step guide to pairing any HomeLink button to a FAAC swing or slide gate operator, covering the rolling-code board handshake, model notes, and common failure points.

HomeLink for Renters: What the Lease Doesn't Tell You
Programming HomeLink at a rental home is possible — with your landlord's help. This covers what you actually need, what to clear at move-out, and what to do when the gate is rolling code.
How to Retrain HomeLink: The LEARN Button Step Most People Miss
HomeLink retraining takes two minutes — if you know about the LEARN button step. Here is the exact sequence for fixed-code and rolling-code openers, and why the LED can mislead you.